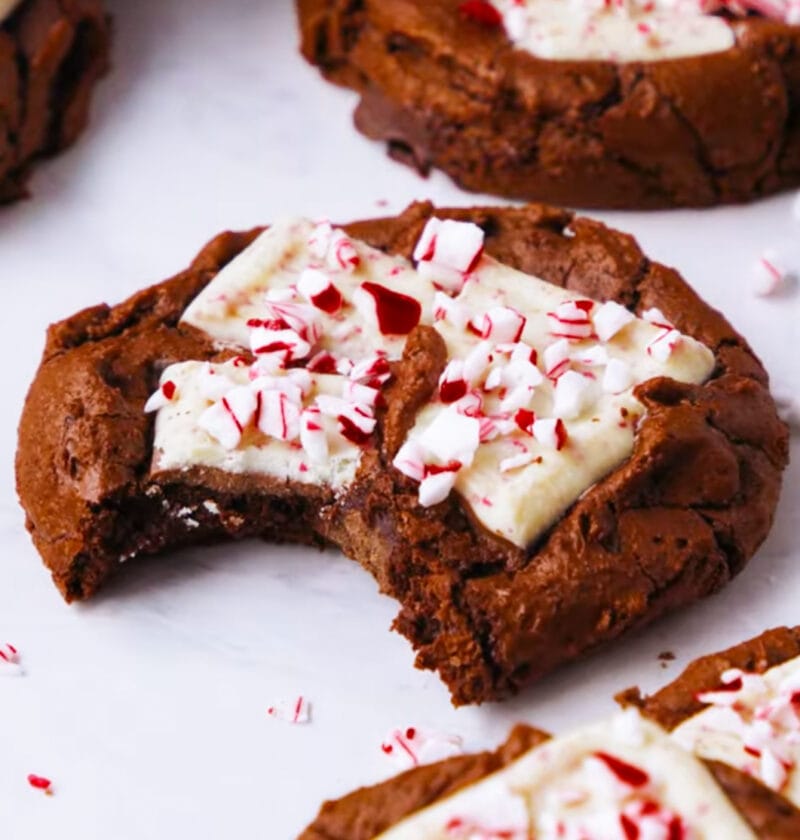
Can you picture pulling a batch of rich dark brownies from the oven, chocolate hotness in the air? On the way to cool down you throw in that famous “white chocolate” and “peppermint” layer, and watch it all come together to create a gorgeous, joyful mosaic. The fudgy brownie texture and the crunchy peppermint bark are about as perfectly contrasted as anything I ever imagined. This recipe is not a dessert—it’s a holiday experience you can bake from your own kitchen, which will be perfect squares and everyone will love! You’re going to enjoy its ease of coming up with such an impressive treat.
Peppermint Bark Brownies
Fudgy chocolate brownies topped with a crunchy, cool peppermint bark layer.
Ingredients
-
-
- 1 cup (2 sticks) unsalted butter, melted
-
- 2 cups granulated sugar
-
- 4 large eggs
-
- 1 teaspoon vanilla extract
-
- 1 cup all-purpose flour
-
- ¾ cup unsweetened cocoa powder
-
- ½ teaspoon salt
-
- 1 cup semi-sweet chocolate chips
-
- 12 ounces good quality white chocolate chips or melting wafers
-
- ½ teaspoon peppermint extract
-
- ¾ cup crushed peppermint candies (about 6-8 standard candy canes)
-
Necessary Utensils & Equipment
-
-
-
- 9×13 inch baking pan
-
- Parchment paper
-
- Large mixing bowls (2-3)
-
- Whisk
-
- Rubber spatula
-
- Small saucepan or microwave-safe bowl (for melting butter)
-
- Double boiler setup or separate microwave-safe bowl (for white chocolate)
-
- Measuring cups and spoons
-
- Wire cooling rack
-
- Sharp knife (for cutting brownies)
-
- Plastic bag and rolling pin (for crushing candy canes)
-
-
Instructions
-
-
-
- Preheat Oven & Prep Pan: Preheat your oven to 350°F (175°C). Line a 9×13 inch baking pan with parchment paper, leaving an overhang on the sides for easy removal. This is a game-changer for clean cuts!
-
- Melt Butter & Sugar: In a large mixing bowl, combine the melted butter and granulated sugar. Whisk them together until smooth and well blended.
-
- Add Wet Ingredients: Whisk in the eggs one at a time, ensuring each is fully incorporated before adding the next. Stir in the vanilla extract.
-
- Combine Dry Ingredients: In a separate bowl, whisk together the all-purpose flour, cocoa powder, and salt.
-
- Mix Batter: Gradually add the dry ingredients to the wet ingredients, mixing with a rubber spatula just until combined. Be careful not to overmix! Gently fold in the semi-sweet chocolate chips.
-
- Bake Brownies: Pour the brownie batter into your prepared baking pan and spread it evenly. Bake for 28-32 minutes, or until a toothpick inserted into the center comes out with moist crumbs, but not wet batter.
-
- Cool Completely: Remove the brownies from the oven and let them cool completely in the pan on a wire rack. This is absolutely critical for the peppermint bark layer. The first time I tried making these, I got a little impatient and didn’t let the brownies cool completely before pouring on the white chocolate. It resulted in a slightly marbled, albeit still tasty, mess! Lesson learned: absolute coolness is key for that distinct, crisp bark layer!
-
- Prepare Peppermint Bark Layer: Once the brownies are completely cool, melt the white chocolate chips/wafers using a double boiler or in the microwave in 30-second intervals, stirring until smooth. Stir in the peppermint extract.
-
- Apply Bark & Peppermint: Pour the melted white chocolate over the cooled brownies and spread it into an even layer with your spatula. Immediately sprinkle the crushed peppermint candies evenly over the white chocolate.
-
- Chill to Set: Place the pan in the refrigerator for at least 30-60 minutes, or until the peppermint bark layer is completely set and firm.
-
- Cut & Serve: Once set, use the parchment paper overhang to lift the brownies out of the pan. Place on a cutting board. Using a sharp knife, cut into 16 squares. For cleaner cuts, you can warm your knife under hot water and wipe it dry between cuts.
-
-
Expert Tips for Success
You’ve got the basics down, but a few pointers can make these Peppermint Bark Brownies go from good to truly incredible. I’ve made these enough times to learn a trick or two, and I’m happy to share my insights!
Achieving the Perfect Fudgy Brownie Base
The foundation of these amazing brownies is, well, the brownie itself! We’re going for rich, dense, and deeply chocolatey. Here’s how:
For the fudgiest brownies, don’t overmix your batter once the flour is added. Mix just until combined; a few streaks of flour are perfectly okay. Overmixing develops gluten, which can lead to tougher, cake-like brownies instead of that craveable fudgy texture.
Also, pay close attention to your baking time. An underbaked brownie is gooey (good!), but an overbaked one quickly dries out. Stick to the lower end of the baking time, and remember that residual heat will continue to cook them slightly once out of the oven.
Mastering the Peppermint Bark Layer
That crisp, cool peppermint layer is what really makes these brownies shine. Here’s what I’ve learned about getting it just right:
- Cool Brownies are a Must: As mentioned in the instructions, ensure your brownies are completely, utterly cool before adding the white chocolate. Any warmth will cause the white chocolate to melt and bleed into the brownies, messing up that beautiful layered effect.
- Quality White Chocolate Matters: Don’t skimp on the white chocolate. Good quality white chocolate chips or melting wafers will melt smoothly and set properly. Lower quality options can sometimes seize or become grainy.
- Crushing Peppermint Candies: The easiest way to crush candy canes is to put them in a sturdy Ziploc bag, seal it, and gently smash them with a rolling pin or the bottom of a heavy pan. Aim for a mix of fine crumbs and small chunks for visual appeal and varied texture.
- Work Quickly: Once the peppermint extract is in the white chocolate, and it’s poured over the brownies, work fairly quickly to spread it and sprinkle the crushed peppermint. White chocolate sets fast, especially on a cool brownie.
Storage and Make-Ahead Options
These brownies are fantastic for parties or gifting, so knowing how to store them is super helpful!
Store your Peppermint Bark Brownies in an airtight container at room temperature for up to 3-4 days. If your kitchen runs warm, or if you prefer a firmer bark, you can store them in the refrigerator. Just be sure to let them come closer to room temperature for the best texture and flavor before serving.
You can also freeze these brownies! Once the bark is fully set, cut them into squares, then place them in an airtight container with parchment paper between layers to prevent sticking. They’ll keep well in the freezer for up to 2 months. Thaw them in the refrigerator overnight or at room temperature for a few hours before enjoying.
Frequently Asked Questions
Can I use milk chocolate or dark chocolate for the bark layer instead of white chocolate?
While traditional peppermint bark uses white chocolate for its contrasting color and sweetness, you absolutely can experiment! Dark chocolate peppermint bark is a delicious alternative, offering a richer, less sweet flavor profile. Milk chocolate could also work, but be sure to use a good quality one that melts smoothly.
How do I prevent my peppermint bark from cracking when I cut the brownies?
The key here is a sharp knife and, optionally, warming it slightly. Run your knife under hot water for a few seconds, wipe it completely dry, then make your cut. The warm blade helps to slice through the bark cleanly without shattering it. Repeat this process for each cut, and you’ll get those beautiful, clean edges.
Can I make these Peppermint Bark Brownies ahead of time?
Yes, these brownies are perfect for making in advance! You can bake the brownies and prepare the bark layer up to 2-3 days before you plan to serve them. Store them uncut in an airtight container in the refrigerator. They’ll also hold up well frozen, as mentioned in our storage tips.
Why did my white chocolate seize or become lumpy when I melted it?
White chocolate can be a bit finicky! It often seizes if it gets too hot too quickly, or if even a tiny drop of water gets into it. When melting, use a double boiler over simmering water (not boiling), or microwave in short 15-30 second bursts, stirring well between each interval. Always use completely dry bowls and utensils.
What if I don’t have peppermint extract? Can I still make this recipe?
Peppermint extract gives the bark its signature flavor, so it’s quite important. If you don’t have it, you could try using a very small amount of finely crushed peppermint candy in the melted white chocolate itself, though the flavor might be less potent. For the true peppermint bark experience, I’d definitely recommend getting the extract!