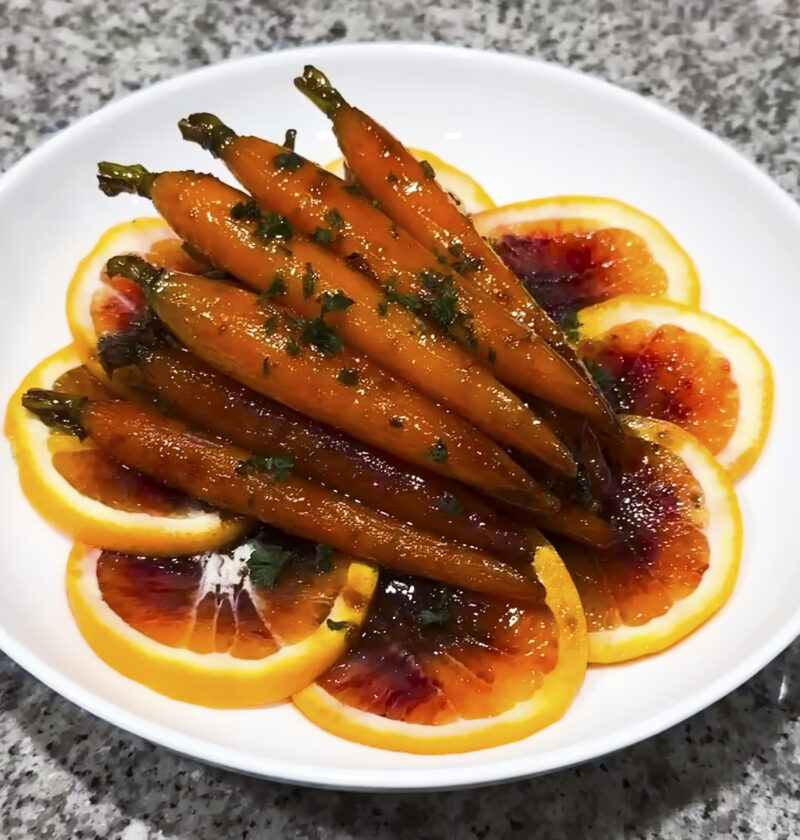
Remember when a family member or friend said this was their favorite meal? For me, that’s this glazed carrot recipe. It’s truly special. We’re referring to colourful, soft carrots, beautifully glazed with a sweet and tart sauce you can’t resist. This isn’t a side, it’s a star that will add color and amazing flavor to your plate with virtually any main course. If you’re looking for a simple, yet beautiful vegetable dish, you’ve just found it.
Glazed carrots
Tender carrots coated in a bright, sticky glaze that everyone will adore.
Ingredients
-
-
- 1 lb carrots, peeled and sliced into 1/2-inch thick coins or sticks
-
- 2 tablespoons unsalted butter
-
- 1/4 cup brown sugar, packed (light or dark)
-
- 1/4 cup water or vegetable broth
-
- 1 tablespoon fresh orange juice (optional, for extra tang)
-
- 1/2 teaspoon salt
-
- 1/4 teaspoon black pepper
-
- 1 tablespoon fresh parsley, chopped (for garnish, optional)
-
Necessary Utensils & Equipment
Instructions
-
-
-
- Prep Your Carrots: Start by peeling your carrots. For uniform cooking, slice them into 1/2-inch thick coins or diagonal cuts. If you’re using baby carrots, you can just rinse them well.
-
- Sauté the Carrots: In a large skillet or saucepan with a lid, melt the butter over medium heat. Add the sliced carrots and cook for 3-5 minutes, stirring occasionally, until they start to brighten in color.
-
- Add the Glaze Ingredients: Pour in the brown sugar, water (or broth), orange juice (if using), salt, and pepper. Stir everything together until the sugar dissolves and coats the carrots.
-
- Simmer to Tenderness: Bring the mixture to a gentle simmer. Reduce the heat to low, cover the skillet, and let the carrots cook for 8-12 minutes, or until they’re tender-crisp. You want them to be soft enough to bite through, but still have a slight firmness.
-
- Reduce the Glaze: Remove the lid and increase the heat to medium-high. Cook for another 2-3 minutes, stirring continuously, until the liquid thickens into a glossy, sticky glaze that clings beautifully to the carrots. Watch carefully to avoid burning!
-
- Serve: Remove from heat immediately. Transfer the glazed carrots to a serving dish. If you like, sprinkle with fresh chopped parsley for a bright, herbaceous finish.
-
-
This recipe might seem straightforward, but a few pointers can take your glazed carrots from good to unforgettable. I’ve certainly had my share of kitchen learning moments with this one!
Choosing and Preparing Your Carrots
The type and cut of carrots really matter here. Fresh, crisp carrots will give you the best texture. I remember the first time I tried this recipe with some older, slightly limp carrots I had on hand – the result was just okay. Always start with firm, bright orange carrots for the best results.
- Fresh is Best: Look for carrots that are firm and bright in color. Avoid any that are soft or have dark spots.
- Uniform Cuts: Whether you choose coins, sticks, or baby carrots, aim for a consistent size. This helps them cook evenly. If some pieces are too thick and others too thin, you’ll end up with a mix of mushy and crunchy bits.
- Peeling: I always peel my carrots. While technically optional, removing the outer skin helps the glaze adhere better and gives them a smoother texture.
Achieving the Perfect Glaze
The glaze is the heart of this dish. It’s that sweet and tangy coating that makes these carrots so addictive. Getting it just right requires a little patience and attention.
Pro Tip: Don’t rush the glaze reduction step. Let it simmer uncovered on medium-high heat until it visibly thickens and coats the back of a spoon. This creates that lovely, sticky finish.
- Sweetness Balance: Brown sugar provides a caramel-like depth. If you prefer a more complex sweetness, you can swap half of the brown sugar for maple syrup or honey. Just remember that honey can thicken more quickly.
- Tangy Kick: The optional orange juice adds a wonderful brightness that cuts through the sweetness. A tiny pinch of freshly grated orange zest can also bring in more citrus aroma. Lemon juice works too, but orange gives a milder, sweeter tang.
- Glaze Consistency: If your glaze is too thin, continue simmering it uncovered until it reduces. If it becomes too thick too quickly, you can stir in a tablespoon of water or broth at a time until it reaches your desired consistency. The goal is a syrupy, glossy coating, not a sticky candy shell.
Flavor Variations to Try
Glazed carrots are wonderfully adaptable. Once you’ve mastered the basic recipe, try playing with different flavors!
- Spicy Glaze: Add a tiny pinch of red pepper flakes or a dash of hot sauce along with the other glaze ingredients for a subtle heat.
- Herbaceous Notes: Beyond parsley, consider fresh thyme or a sprig of rosemary during the simmering stage. Just be sure to remove any woody stems before serving.
- Ginger-Kissed: Grate half a teaspoon of fresh ginger into the glaze mixture for a warm, aromatic twist.
- Vinegar Zing: A splash of apple cider vinegar (about 1 teaspoon) can substitute for the orange juice if you’re looking for a different kind of tang.
Making Ahead & Storage
These carrots are best served fresh and warm, but you can certainly prepare them slightly ahead of time.
- Make Ahead: You can cook the carrots up to the simmering stage (Step 4), then cool them completely and store them in an airtight container in the refrigerator for up to 2 days. When ready to serve, reheat them gently in a skillet with a splash of water, then reduce the glaze as per Step 5.
- Storage: Leftovers can be stored in an airtight container in the refrigerator for 3-4 days. Reheat gently in a microwave or on the stovetop over low heat. The glaze might be a bit thicker after chilling, so a tiny splash of water during reheating can help loosen it up.
Frequently Asked Questions
Can I use baby carrots for this recipe?
Yes, absolutely! Baby carrots work wonderfully in this recipe and save you the peeling and slicing time. Just make sure to rinse them thoroughly before cooking. Their smaller size often means they’ll cook a bit faster than larger sliced carrots, so keep an eye on them during the simmering stage. You’re aiming for that tender-crisp texture, no matter the carrot type.
My glaze isn’t thickening. What should I do?
If your glaze is too thin, the most likely reason is that it hasn’t reduced enough. After the carrots are tender, remove the lid and increase the heat to medium-high. Continue to cook, stirring frequently, to evaporate more of the liquid. The sugars will caramelize as the water leaves, making the glaze thicker and stickier. Be patient, it might take a few extra minutes, but watch it closely to avoid burning.
What can I serve with these glazed carrots?
These sweet and savory glazed carrots are incredibly versatile and pair well with so many dishes. They’re fantastic alongside roasted chicken, pork chops, or a juicy steak. For a vegetarian meal, they’re a lovely accompaniment to lentil loaf, quinoa, or roasted root vegetables. They also make a bright and colorful addition to any holiday spread, like Thanksgiving or Christmas dinner.
Are there any sugar substitutes I can use?
Yes, you can certainly adjust the sweetness. Instead of brown sugar, you can use maple syrup or honey, keeping in mind that the flavor profile will shift slightly. Start with a slightly smaller amount (e.g., 3 tablespoons) and taste as you go, adding more if you prefer. For a sugar-free option, you could try a granulated erythritol-based sweetener, but be aware that it might not create the same sticky, caramelized glaze texture.
Can I make this recipe in an air fryer?
While the traditional method creates that beautiful stovetop glaze, you can definitely cook carrots in an air fryer first and then coat them in a glaze. Cut your carrots, toss them with a little oil, salt, and pepper, then air fry at 375°F (190°C) for 12-15 minutes, shaking the basket halfway, until tender. Meanwhile, prepare the glaze separately in a small saucepan. Once the carrots are cooked, toss them immediately with the warm glaze in a bowl. It’s a great way to get a slightly different texture!