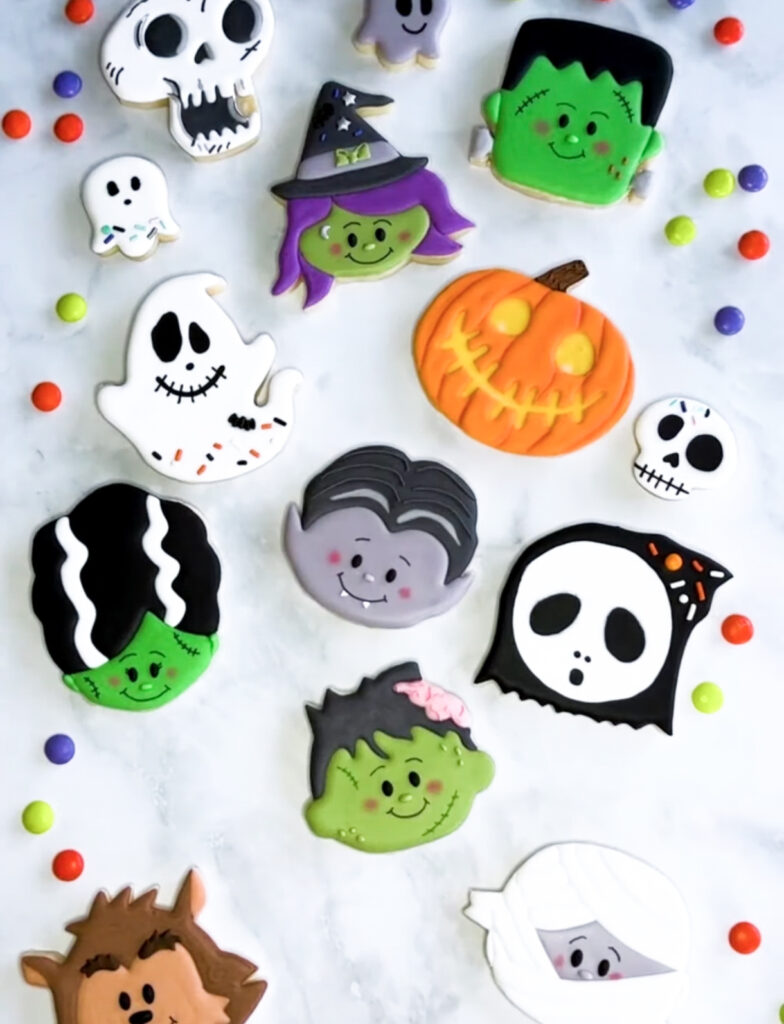
Halloween season’s here!Halloween season’s coming! Looking to get your hands filthy with fun (and perhaps a little spook) and baking? I’m referring to those cute little cookies made special, which can transform any party or trick-or-treating basket into a light-up delight! Say goodbye to store bought, plain items. Making decorative cookies at home, that taste as well as look amazing, for Halloween.
These are not only cookies, they’re miniature canvases to draw on for the holiday spirit. Even if you’re a seasoned baker or just a beginner in the world of royal icing, I am sure you’ll find this recipe to be simple to make and very rewarding! Prepare your edible artwork for all to enjoy!
Halloween Decorative Cookies
Ingredients
- 2.5 cups all-purpose flour
- 1 teaspoon baking powder
- 0.5 teaspoon salt
- 1 cup (2 sticks) unsalted butter, softened
- 1 cup granulated sugar
- 1″>1 large egg
- 1 teaspoon vanilla extract
- 4 cups powdered sugar
- 0.25 cup milk (or water, for thinner icing)
- 0.5 teaspoon almond extract (optional, for royal icing)
- Food coloring gels (orange, black, purple, green)
Necessary Utensils & Equipment
-
-
- Electric Mixer (stand or hand-held)
-
- Measuring Cups and Spoons
-
- Rubber Spatula
-
- Halloween-themed Cookie Cutters (ghosts, pumpkins, bats, witches hats)
-
- Baking Sheets
-
- Parchment Paper or Silicone Baking Mats
-
- Wire Cooling Rack
-
- Small Bowls (for coloring icing)
-
- Piping Bags with Small Round Tips (or Ziploc bags with corners snipped)
Instructions
-
- Preheat your oven to 375°F (190°C). Line your baking sheets with parchment paper or silicone mats.
- In a medium bowl, whisk together the flour, baking powder, and salt. Set aside.
- In a large mixing bowl, cream together the softened butter and granulated sugar with an electric mixer until light and fluffy. This usually takes about 2-3 minutes.
- Beat in the egg and vanilla extract until fully combined. Make sure there are no streaks of egg visible.
- Gradually add the dry ingredients to the wet ingredients, mixing on low speed until just combined. Be careful not to overmix; stop as soon as the flour disappears. The dough will be soft.
- Divide the dough into two equal portions. Flour a clean surface and your rolling pin lightly. Roll out one portion of dough to about 1/4 inch thickness.
- Use your Halloween cookie cutters to cut out shapes. Place the cut-out cookies onto the prepared baking sheets, leaving about an inch between each cookie.
- Bake for 8-10 minutes, or until the edges are lightly golden. The exact time will depend on your oven and cookie thickness.
- Let the cookies cool on the baking sheets for 5 minutes before transferring them to a wire rack to cool completely. It’s super important your cookies are fully cooled before decorating, or your icing will melt!
- While the cookies cool, prepare your royal icing. In a clean, large bowl, combine the powdered sugar, milk (or water), and almond extract (if using). Beat with an electric mixer on low speed until smooth. If it’s too thick, add more liquid a teaspoon at a time. If it’s too thin, add more powdered sugar. You’re aiming for a consistency that holds its shape but can be piped.
- Divide the icing into several small bowls – one for each color you want to use. Add food coloring gels a tiny bit at a time, mixing well until you reach your desired shades.
- Transfer your colored icings into piping bags fitted with small round tips, or into Ziploc bags with a tiny corner snipped off.
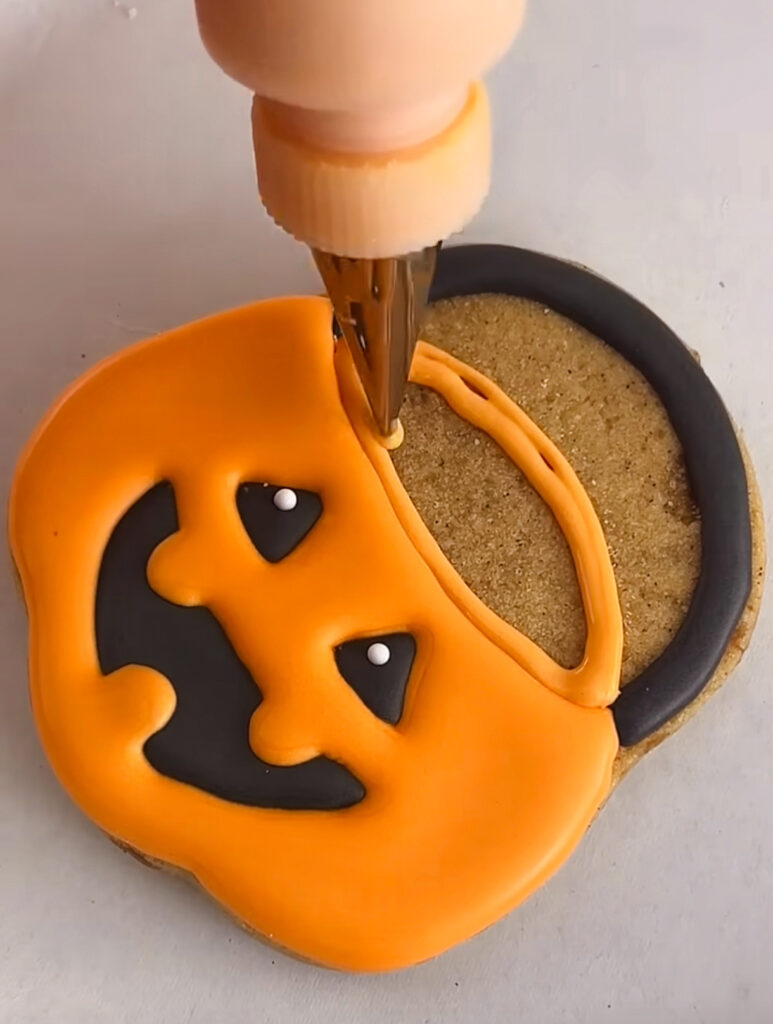
- Decorate your completely cooled cookies! Outline the shapes first with a slightly thicker icing, let it set for a few minutes, then flood the inside with a slightly thinner consistency of the same color. Use a toothpick to spread the icing to the edges and pop any air bubbles. Let each layer of icing dry completely before adding intricate details. This can take several hours, or even overnight, depending on humidity.
My Take On Making It Perfect!
Alright, you’ve got the basic recipe down, but let’s be real – making decorative cookies can sometimes throw a curveball. Don’t worry, I’ve got your back with some tried-and-true advice to make your Halloween baking a scream!
Getting That Perfect Dough
Making a good cookie dough is the foundation for beautiful decorated cookies. You want a dough that holds its shape, doesn’t spread too much, and tastes wonderful.
- Don’t skip the chilling step: While this recipe doesn’t explicitly call for chilling the dough, if you’re working in a warm kitchen or your dough feels *really* soft, pop it in the fridge for 20-30 minutes. This helps prevent spreading and keeps those intricate cutter shapes nice and crisp.
- Measure your flour correctly: This might sound basic, but scooping flour directly from the bag can add too much, making your cookies dry and crumbly. I always recommend using the spoon-and-level method: spoon flour into your measuring cup, then level it off with a straight edge.
- The first time I tried making cutout cookies for Halloween, I was so excited that I rushed the rolling process. My dough wasn’t evenly thick, and some cookies came out perfectly while others were either burned or undercooked in the middle. Talk about frustrating! Now, I always make sure to roll the dough to a consistent 1/4 inch thickness. It makes all the difference for even baking.
Pro Tip: For extra smooth royal icing, sift your powdered sugar before mixing. It helps get rid of any lumps and makes your finished icing wonderfully velvety.
Icing Consistency: The Decorator’s Best Friend
Royal icing can be a little finicky, but once you understand consistency, you’ll be a pro! You’ll need at least two main consistencies:
- Outline Icing: This should be like toothpaste. When you lift your spoon, the ribbon of icing should hold its shape for a few seconds before slowly melting back into itself. This forms a “dam” around your cookie.
- Flood Icing: This needs to be thinner, like thick syrup. When you lift your spoon, the ribbon should disappear back into the bowl within 5-10 seconds. This fills in your outline.
Adjusting icing consistency is all about adding tiny amounts of liquid (milk or water) for thinner, or powdered sugar for thicker. Go slowly! It’s easier to add more than to take away.
Creative Decorating Hacks

This is where the fun truly begins! Let your creativity run wild.
- Practice makes perfect: Don’t expect your first cookie to be a masterpiece. Grab a piece of parchment paper and practice piping lines, dots, and zigzags before you go for the real thing.
- Use simple designs for big impact: Think ghosts with two black dots for eyes, or pumpkins with a simple jack-o’-lantern smile. You don’t need to be an artist to make them adorable.
- Layer your colors: If you’re doing a multi-color design, let each color dry for at least 30 minutes (preferably longer) before adding another color right next to it. This stops the colors from bleeding into each other.
- Add texture with sprinkles: Before the icing dries completely, sprinkle on some Halloween-themed sprinkles, edible glitter, or colored sugars. It adds a nice touch and hides any minor icing imperfections!
Storing Your Spooky Treats
You’ve put all that effort in; let’s make sure they stay fresh and lovely!
- Airtight is key: Once your decorated cookies are completely dry (this can take 12-24 hours depending on humidity), store them in an airtight container at room temperature.
- Separate layers: If you’re stacking them, place a piece of parchment paper between layers to prevent them from sticking or smudging.
- Freezing? You can freeze undecorated sugar cookies for up to 3 months. Just wrap them tightly in plastic wrap and then aluminum foil. Thaw at room temperature before decorating. I don’t recommend freezing *decorated* cookies, as the icing can sometimes weep or crack when thawed.
Frequently Asked Questions
Can I make the cookie dough ahead of time?
Absolutely! You can whip up the dough, wrap it tightly in plastic wrap, and store it in the refrigerator for up to 3 days. When you’re ready to bake, let it sit out at room temperature for about 15-20 minutes to soften slightly before rolling.
What if my cookies spread in the oven and lose their shape?
This is a common issue! It’s usually due to warm butter, over-mixing the dough, or not chilling it enough. Make sure your butter is softened but not melted. Mix the dough just until combined. If your kitchen is warm, chill the dough for at least 30 minutes after mixing and even after cutting the shapes, before baking.
How can I make my decorative cookies less sweet?
Honestly, sugar cookies and royal icing are meant to be sweet! However, you can try reducing the sugar in the cookie dough by about a quarter cup. For the icing, using a little less powdered sugar can work, but be careful not to make it too thin to pipe. You could also try a cream cheese frosting for decoration, which is less sweet than royal icing but won’t harden as much.
What are some other fun Halloween cookie decorating ideas?
Oh, the possibilities are endless! Think beyond just ghosts and pumpkins. You could make mummy cookies by piping white icing in strips, Frankenstein monster faces, spiderwebs on round cookies, or even candy corn shapes. Use different sprinkles, edible markers, or even small candies like googly eyes to add character. The only limit is your imagination!
So, what spooky shapes will you be making first this Halloween season? Let me know!