Packing the lunchbox can seem like a puzzle, don’t you think? You need something fast, something your children will eat and definitely not another soggy sandwich! I got your back! This is truly a game changing mini lunch box pizza recipe. Super quick, highly customizable and children love them! Say goodbye to mundane lunch break meals and hello to a fun and flavored lunchbox with these mini pizzas! They’re also great for those hectic weeknight dinners when you need dinner on the table quickly! I don’t know about you, but if you try these, you’ll thank me for it!
Mini lunchbox pizza
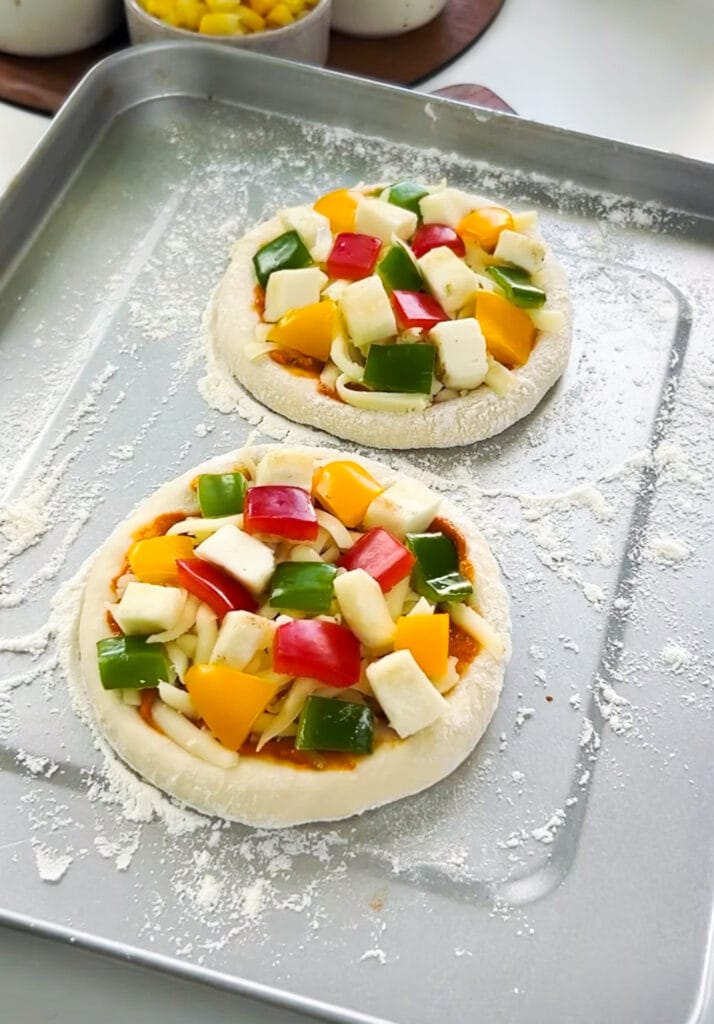
Ingredients
-
-
- 4 English muffins, pita breads, or small pre-made pizza crusts
-
- ½ cup pizza sauce (store-bought or homemade)
-
- 1 cup shredded mozzarella cheese
-
- ¼ cup pepperoni slices (mini preferred)
-
- ¼ cup diced bell peppers (any color)
-
- 2 tablespoons grated Parmesan cheese (optional)
-
- ½ teaspoon dried oregano
-
- A drizzle of olive oil (optional, for brushing crusts)
-
Necessary Utensils & Equipment
-
-
-
- Baking sheet
-
- Parchment paper (optional, for easy cleanup)
-
- Measuring cups and spoons
-
- Small spatula or spoon (for spreading sauce)
-
- Cutting board
-
- Knife (for dicing vegetables)
-
-
Instructions
-
-
-
- Preheat Oven & Prep Bases: Get your oven heated to 400°F (200°C). If you’re using English muffins, gently split them in half. Lay your chosen pizza bases on a baking sheet, ideally lined with parchment paper for easy cleanup. If you like, brush the edges of your bases with a little olive oil for extra crispiness.
-
- Sauce It Up: Spoon about 1-2 tablespoons of pizza sauce onto each base. Spread it out evenly, leaving a small border for the crust.
-
- Add Cheese & Toppings: Sprinkle a generous amount of shredded mozzarella over the sauce. Now for the fun part! Add your pepperoni, diced bell peppers, and any other toppings you’re using. I like to add a pinch of dried oregano and a dash of Parmesan on top for extra flavor.
-
- Bake to Perfection: Pop the baking sheet into your preheated oven. Bake for 10-12 minutes, or until the cheese is beautifully melted and bubbly, and the crust edges are golden brown. Keep a close eye on them, as oven temperatures can vary!
-
- Cool & Serve/Pack: Carefully remove the pizzas from the oven. Let them cool on the baking sheet for a few minutes before transferring them to a wire rack. This helps prevent a soggy bottom. Once completely cooled, they’re ready to pack into lunchboxes or enjoy right away! The aroma of warm tomato, gooey cheese, and savory pepperoni will fill your kitchen – it’s pure comfort.
-
-
Expert Tips for Success with Your Mini Lunchbox Pizzas
So you have the basics of the recipe down! However, I have some tips and tricks to make these mini pizzas even better. I can assure you, I’ve done my share of lunchtime “experiments” through the years and a little planning can make all the difference!
I have never made these for school but I packed them with too much wet produce – sliced tomatoes. Big mistake! By lunchtime, they were so wet they were not worth eating at all! I found out very quickly that some toppings should be used sparingly; especially those that give off a lot of water. Dry toppings or pre-sautéing some vegetables really help to hold the crust together.
Pro Tip: For crispier bases, lightly toast your English muffin halves or pita breads in the oven or a toaster *before* adding the sauce and toppings. This creates a barrier that helps prevent sogginess.
Customization is Key
The beauty of mini pizzas is how incredibly versatile they are. Get creative with what you have on hand or what your family loves!
- Veggie Power: Try finely diced mushrooms, spinach (sautéed and squeezed dry first!), corn, black olives, or even a sprinkle of finely grated carrot.
- Protein Punch: Leftover cooked chicken, crumbled sausage, ham, or even a few chickpeas can add extra oomph.
- Cheese Please: Don’t stop at mozzarella! A mix of provolone, cheddar, or a fancy Italian blend works wonders.
- Sauce Swap: Pesto instead of tomato sauce? Absolutely! White garlic sauce? Go for it!
Make-Ahead & Storage

These are perfect for meal prepping. You can assemble a big batch on Sunday and have lunches ready for days!
- Cool Completely: This is important! Make sure your mini pizzas are entirely cool before packing them away. Warm pizzas will create condensation and make everything wet.
- Storage: Once cool, store them in an airtight container in the refrigerator for up to 3-4 days. You can stack them with parchment paper in between if you’re making a big batch.
- Freezing for Later: Yes, you can freeze them! Arrange the cooled pizzas in a single layer on a baking sheet and freeze until solid. Then, transfer them to a freezer-safe bag or container. They’ll keep well for up to 1 month.
- Reheating:
- Oven: For best results, reheat frozen pizzas in a preheated oven at 350°F (175°C) for about 10-15 minutes, or until warmed through and cheese is bubbly.
- Toaster Oven: A toaster oven is ideal for reheating one or two, making them nice and crisp again in about 5-7 minutes.
- Microwave: While convenient, the microwave can make them a bit soft. Heat for 30-60 seconds, or until warm.
So, there you have it! A quick, easy, and endlessly adaptable recipe that’s sure to bring smiles to lunchboxes and dinner tables alike. What’s your family’s favorite pizza topping? I’d love to hear your ideas in the comments below!
Frequently Asked Questions
What are the best bases for mini lunchbox pizzas?
English muffins are a classic for mini pizzas because they’re sturdy and toast up well. However, small pita breads, pre-made mini pizza crusts, or even sliced bagels work perfectly too! Choose whatever you and your kids like best.
Can I make these mini pizzas ahead of time?
Absolutely! These are fantastic for meal prepping. You can assemble and bake them up to 3-4 days in advance and store them in an airtight container in the refrigerator. They also freeze really well for up to a month.
How do I prevent the crust from getting soggy?
The key is to pre-toast your chosen base slightly before adding sauce and toppings. Also, make sure your toppings aren’t too wet. If using high-moisture veggies like mushrooms, quickly sauté them first to draw out some liquid, then pat them dry before adding to the pizza. Always let the pizzas cool completely before storing!
What are some healthy topping ideas for kids’ lunchboxes?
For healthy additions, think finely diced bell peppers, shredded zucchini (squeezed dry), corn kernels, cooked chicken, or even a sprinkle of black beans. You can also hide some extra veggies by pureeing them into your pizza sauce!
Are these only for lunchboxes, or can we eat them for dinner?
Oh, these are definitely not just for lunchboxes! They make a fantastic, quick weeknight dinner, especially when you’re short on time. They’re also brilliant for parties or as an after-school snack. Just double or triple the recipe as needed!