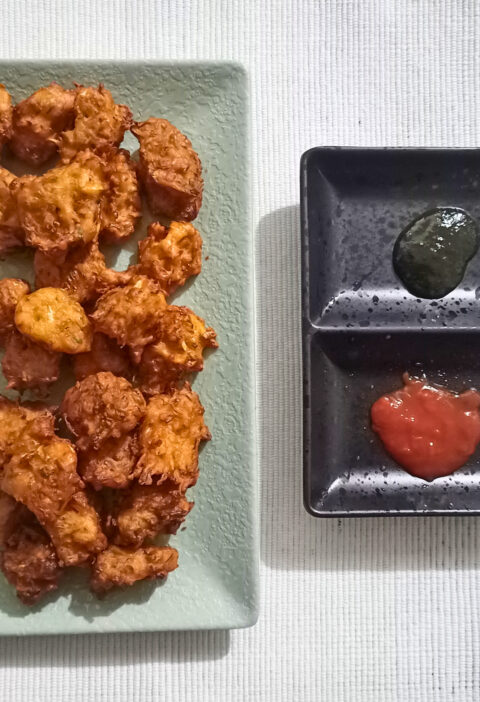
What makes a good week night meal great? I believe it’s those little bits of delight, those unexpected textures and tastes that make you smile. As with anything else, you’ll know it when you see it—a hidden gem on a menu, a simple comforting snack, just different. Today’s recipe is something special: crispy, gooey corn cheese balls! They’re a revelation, surprisingly simple to make, and they vanish quicker than you can say “more, please!” Prepare to satisfy your taste buds!
These little golden nuggets are incredibly popular for a good reason. They’re quick, they’re packed with flavor, and honestly, they’re just plain fun to eat. Whether you’re looking for a crowd-pleasing appetizer, a delicious snack for game night, or just something comforting to munch on, these corn cheese balls are your answer. You won’t believe how much flavor we’re packing into such a simple recipe.
Corn cheese ball
Golden, crispy corn balls bursting with savory melted cheese.
Ingredients
-
-
- 1 cup canned sweet corn, drained very well
-
- 1 medium potato, boiled, peeled, and mashed smooth
-
- 1 cup shredded mozzarella cheese (or a blend of mozzarella and cheddar)
-
- 1/2 teaspoon black pepper
-
- 1/2 teaspoon salt, or to taste
-
- 1/4 teaspoon red chili flakes (optional, for a subtle kick)
-
- 1/2 teaspoon dried oregano (optional, adds an herb note)
-
- 1/2 cup all-purpose flour
-
- 1/2 cup milk
-
- 1 cup breadcrumbs (panko breadcrumbs for extra crispiness)
-
- Oil for deep frying (vegetable, canola, or sunflower oil)
-
Necessary Utensils & Equipment
-
-
-
- Large Mixing Bowl
-
- Potato Masher or Fork
-
- Measuring Cups and Spoons
-
- Two Shallow Bowls (for the dredging station)
-
- Deep Frying Pan, Dutch Oven, or Air Fryer
-
- Slotted Spoon or Spider (for frying)
-
- Plate Lined with Paper Towels (for draining)
-
- Small Whisk or Fork (for milk mixture)
-
-
Instructions
-
-
-
- Prepare the Corn & Potato Mixture: In your large mixing bowl, combine the well-drained sweet corn and the smoothly mashed potato. It’s important that your potato isn’t watery, so mash it thoroughly and let any steam escape.
-
- Add the Cheese and Seasonings: Stir in the shredded mozzarella cheese, black pepper, salt, chili flakes (if using), and dried oregano (if using). Mix everything until it’s just combined. You want the ingredients distributed evenly without overworking the mixture.
-
- Form the Balls: Take small portions of the mixture, about a tablespoon each, and gently roll them into smooth, compact balls. If the mixture feels too sticky, you can lightly flour your hands. Aim for consistent sizes so they cook evenly.
-
- Chill Time (Don’t Skip This!): Place the formed corn cheese balls on a plate or baking sheet. Cover them loosely with plastic wrap and chill them in the refrigerator for at least 30 minutes. This step is a game-changer! Chilling helps them hold their shape beautifully when frying.
-
- Set Up Your Dredging Station: While the balls are chilling, prepare your dredging bowls. In one shallow bowl, add the all-purpose flour. In the second shallow bowl, whisk together the milk. In a third, wider bowl, spread out your breadcrumbs.
-
- Coat the Balls: Once chilled, take a corn cheese ball and first roll it gently in the flour, shaking off any excess. Then dip it into the milk mixture, ensuring it’s fully coated. Finally, roll it generously in the breadcrumbs, pressing lightly to make sure the crumbs stick well all over. Repeat for all the balls.
-
- Preheat Oil for Frying: Pour enough oil into your deep frying pan or Dutch oven to reach about 2-3 inches deep. Heat the oil over medium-high heat until it reaches around 350-375°F (175-190°C). If you don’t have a thermometer, a small piece of breadcrumb should sizzle immediately when dropped in.
-
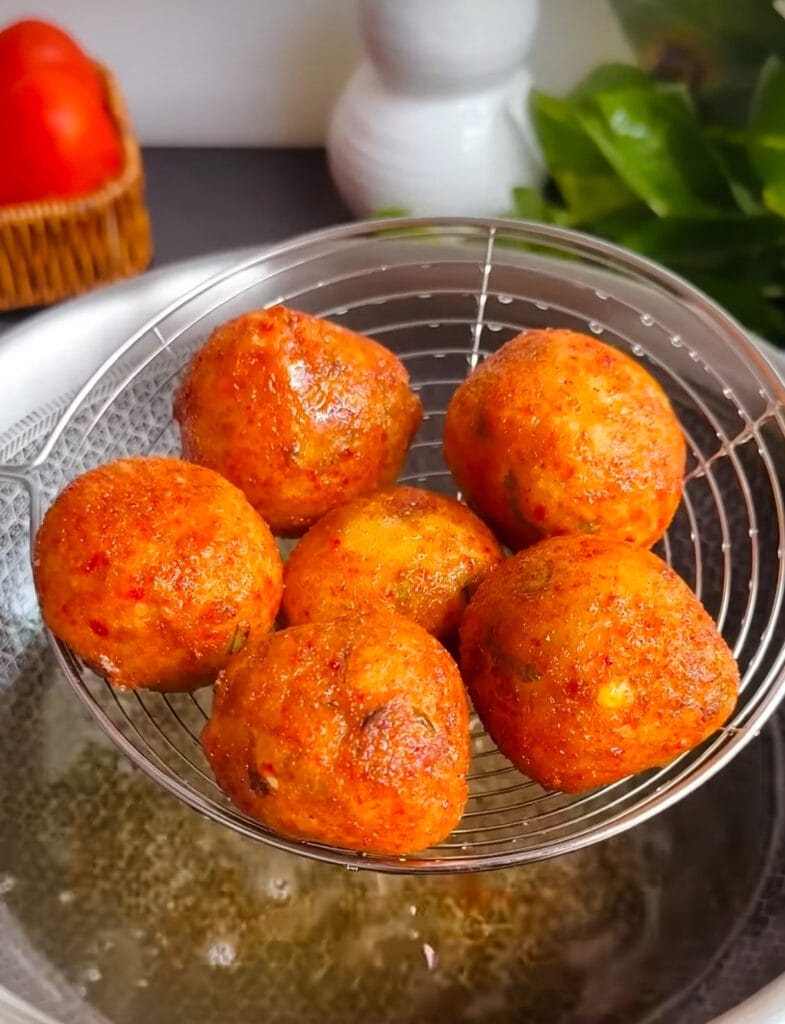
- Fry the Corn Cheese Balls: Carefully place a few coated corn cheese balls into the hot oil. Don’t overcrowd your frying pan. Frying in batches helps maintain the oil temperature and ensures each corn cheese ball gets perfectly golden and crispy without becoming greasy.
-
- Cook Until Golden: Fry for about 2-3 minutes, turning occasionally, until they’re beautifully golden brown on all sides. They cook pretty fast!
-
- Drain and Serve: Remove the fried balls with a slotted spoon and place them on a plate lined with paper towels to drain any excess oil. Serve them hot with your favorite dipping sauce. I love mine with a little sweet chili or a zesty cilantro dip!
-
-
The first time I tried making corn cheese balls, I got a little too excited and skipped the chilling step. Disaster! They pretty much disintegrated into the hot oil, leaving me with a cheesy corn scramble rather than perfectly formed spheres. It was a mess, but a delicious lesson learned! Now, I always make sure they get their proper fridge time. It truly makes all the difference in achieving that perfect, intact ball.
Expert Tips for Success
The process of creating truly outstanding corn cheese balls isn’t difficult, but there are some tips that can help make the cheese balls into something absolutely fantastic. Every time we want the perfect golden exterior and the unbelievably gooey, cheesy interior. Here are some of my tips and tricks:
Achieving the Perfect Texture

- Don’t Skimp on Draining the Corn: This is crucial. Canned corn can hold a lot of moisture, and too much water will make your mixture soggy and hard to form. After draining, you can even press it between a few layers of paper towels to extract extra liquid.
- Mash Potatoes Smoothly: Lumps in your mashed potato mean inconsistent texture in your final ball. Take the time to get your mashed potato really smooth. This will also help it bind better with the corn and cheese.
- The Magic of Chilling: I mentioned this in my anecdote, but it bears repeating! Chilling firms up the mixture, making it much easier to handle and preventing it from falling apart in the hot oil. Thirty minutes is the minimum, but an hour is even better.
Flavor Boosts and Variations
While the basic recipe is fantastic on its own, you can always play around with additions to suit your taste. Don’t be afraid to experiment!
- Spice It Up: If you love heat, add a pinch of cayenne pepper or finely chopped jalapeños to the corn and potato mixture. Be mindful of the quantity; a little goes a long way.
- Herb Power: Besides oregano, try mixing in some finely chopped fresh cilantro, parsley, or chives. These fresh herbs can brighten the flavor considerably.
- Cheese Choices: Mozzarella gives you that classic, amazing cheese pull, but a blend with some sharp cheddar or a touch of Monterey Jack can add more complex cheesy notes.
- Air Fryer Method: If you’re looking for a lighter option, you can definitely air fry these! Preheat your air fryer to 375°F (190°C). Lightly spray the coated balls with oil and air fry for 10-12 minutes, flipping halfway, until golden and crisp. You might not get the same deep golden color as deep frying, but they’ll still be wonderfully crunchy.
Storing and Reheating
Leftovers? Unlikely, but it happens! Or maybe you want to prep ahead for a party. Here’s how to manage:
- Storing Cooked Balls: Once cooled completely, store any leftover corn cheese balls in an airtight container in the refrigerator for up to 2-3 days. Reheat them in an oven or air fryer at 350°F (175°C) until warmed through and crispy again. Microwaving them will make them soft and slightly chewy, losing that lovely crispness.
- Freezing Uncooked Balls: You can absolutely prepare these ahead of time! After coating the corn cheese balls in breadcrumbs, arrange them in a single layer on a baking sheet and freeze until solid. Once frozen, transfer them to a freezer-safe bag or container. They’ll keep well for up to 1-2 months. When you’re ready to cook, fry them directly from frozen, adding a few extra minutes to the cooking time.
Imagine biting through that crisp, golden-brown crust, hearing the satisfying *crunch*, and then experiencing the immediate flood of sweet, tender corn meeting impossibly stretchy, molten cheese. It’s a texture party in your mouth! Give these a try this week, and tell me what you think!
Frequently Asked Questions
Can I air fry corn cheese balls instead of deep frying?
Absolutely! Air frying is a fantastic alternative if you want a lighter version. Just preheat your air fryer to 375°F (190°C), lightly spray the coated balls with a little oil, and air fry for about 10-12 minutes. Remember to flip them halfway through to get even browning and crispiness. They might not be quite as deeply golden as deep-fried versions, but they’re still incredibly delicious.
How do I keep my corn cheese balls from getting soggy?
The key to preventing sogginess is proper drainage of your corn, chilling the mixture adequately, and frying them in hot oil without overcrowding the pan. Make sure your sweet corn is very well drained, and consider pressing out extra moisture with paper towels. Chilling helps the balls hold their shape, and hot oil cooks them quickly without absorbing too much grease. Also, make sure to drain them on paper towels immediately after frying.
What are some good dipping sauces to serve with corn cheese balls?
Oh, the possibilities are endless! I personally love serving them with a sweet chili sauce for a nice sweet and spicy kick. A creamy sriracha mayo, a zesty cilantro-lime dip, or even a simple ketchup are also popular choices. For something a little different, try a homemade garlic aioli or a cool ranch dip.
Can I make the corn cheese ball mixture ahead of time?
Yes, you can definitely prepare the mixture ahead! After you’ve mixed the corn, potato, cheese, and seasonings, form your balls and then chill them in the refrigerator for several hours or even overnight. Just make sure they are covered to prevent drying out. When you’re ready to cook, proceed with the flour, milk, and breadcrumb coating steps before frying. This is a great time-saver for entertaining.
What kind of corn should I use for this recipe?
Canned sweet corn works perfectly for this recipe due to its convenience and consistent sweetness. Just ensure it’s very well drained. You could also use frozen sweet corn, thawed and drained, or even fresh corn cut from the cob and lightly blanched if you’re feeling ambitious.