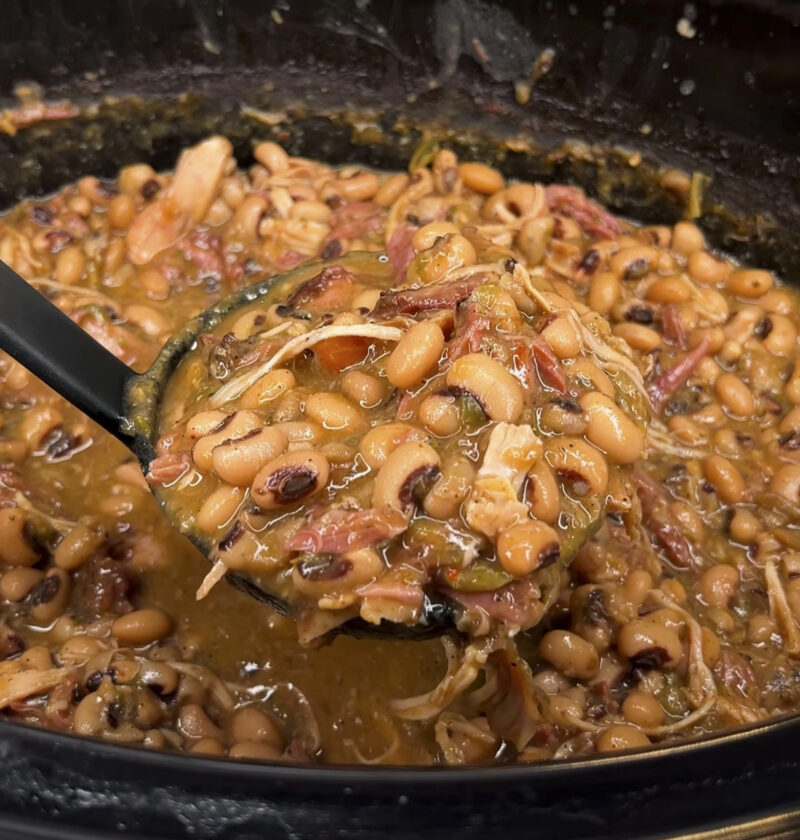
Imagine a lazy Sunday and the smell of something deliciously good is filling the house with its aroma. Such a sensation is what this incredible skillet of black-eyed peas brings to the table. It is a real treat that is sure to bring a smile to your face and will delight you with its exceptional easiness of preparation. So, if you wish to enjoy a scrumptious homely meal without spending ages in the kitchen, this recipe is a perfect find for you. A thick and hearty dish of black-eyed beans is going to become your new favorite and is guaranteed to become a frequent guest in your house on weeknights or relaxingly warm weekends. This recipe will show you how to prepare black-eyed peas skillet in a way that will let you enjoy the robust flavor of this humble legume.
Prior to giving the precise recipe notes, I would like to share some invaluable wisdom with you that I acquired through years of culinary practice. When I first attempted to make a skillet of black-eyed beans, I have forgotten to rinse the beans I have chosen. As a result, they turned out rather salty and bland. Hence, remember to rinse your beans before you add them to a skillet. Trust me, it will significantly improve the final flavor and the overall coziness of the dish.
Black-Eyed pea skillet
A hearty, savory skillet that brings rich Southern flavors to your table with pantry staples.
Ingredients
-
-
- 1 tablespoon olive oil
-
- 4 slices thick-cut bacon, chopped into 1/2-inch pieces (about 4 ounces)
-
- 1 medium yellow onion, diced (about 1 cup)
-
- 1 green bell pepper, diced (about 1 cup)
-
- 2 (15-ounce) cans black-eyed peas, rinsed thoroughly and drained
-
- 2 cups low-sodium chicken or vegetable broth
-
- 1/2 teaspoon salt, or to taste
-
- 1/4 teaspoon black pepper, or to taste
-
- Optional garnishes: fresh chopped parsley, hot sauce, cornbread
-
Necessary Utensils & Equipment
-
-
-
- Large cast-iron skillet (or other heavy-bottomed skillet)
-
- Spatula
-
- Measuring cups and spoons
-
- Can opener
-
- Cutting board
-
- Sharp knife
-
-
Instructions
-
-
-
- Heat a large cast-iron skillet or heavy-bottomed pan over medium heat. Add the chopped bacon and cook until crispy, stirring occasionally. This usually takes about 5-7 minutes. Once cooked, remove the bacon with a slotted spoon and set aside on a paper towel-lined plate, leaving the rendered bacon fat in the skillet. Don’t drain it all – that’s flavor!
-
- Reduce the heat to medium-low. Add the diced onion and bell pepper to the skillet with the bacon fat. Sauté the vegetables, stirring often, until they soften and the onion becomes translucent, which should take about 8-10 minutes. You’ll love how the kitchen starts to smell absolutely amazing at this stage, a true sensory delight! There’s a subtle sweetness that emerges when vegetables are given the time to truly soften, and that’s exactly what we’re aiming for here.
-
- Add the rinsed and drained black-eyed peas to the skillet with the softened vegetables. Pour in the broth, then stir in the salt and pepper. Bring the mixture to a gentle simmer.
-
- Once simmering, reduce the heat to low, cover the skillet, and let it cook for 10-15 minutes. This allows the flavors to really meld together and the peas to absorb the delicious broth. Give it a stir every few minutes to ensure nothing sticks to the bottom.
-
- Remove the lid and continue to simmer for another 5 minutes, or until the liquid has slightly reduced and thickened to your liking. The skillet should look rich and inviting.
-
- Taste and adjust seasonings if necessary. Sometimes, it needs a little more salt or a pinch of pepper, depending on your broth and bacon. Stir the reserved crispy bacon back into the skillet.
-
- Serve your Black-Eyed Pea Skillet hot. It’s fantastic on its own, with a side of cornbread, or over rice. Garnish with fresh parsley or a dash of hot sauce if you like a little kick. Enjoy that comforting, satisfying bite!
-
-
Like me, you might prefer to prepare meals which are rich in flavors yet don’t require shopping for a large amount of ingredients. In this case, the recipe of black-eyed peas in a skillet will perfectly fit your preferences, because it will give you an opportunity to cook the dish typical of classic Southern cuisine – hearty, savory and very aromatic – using only five basic ingredients and some from the pantry.
What makes this recipe great is its versatility. Although the presented recipe will offer you a really tasty beginning, consider it more as a canvas that you can adjust according to your current needs or available ingredients. This recipe is gluten-free by default, and can be made even vegetarian if you want so.
Sometimes the easiest recipes can offer the greatest surprises. As soon as the aroma of fried bacon appears, followed by a combination of onions and bell peppers that create their sweet-and-pungent aroma, you know you have done everything right. The kitchen starts filling with a cozy and tempting smell.
And the black-eyed peas? They’re more than just a delicious legume. This healthy skillet is both satisfying and nourishing, as it’s rich in fiber and protein. So, you’re not only eating something yummy, you’re eating something healthy! It’s a win-win, don’t you think?
One of the best features of a skillet is that everything is put together in one pan. Any time I need to do less cleaning, it’s a plus in my mind! On top of that, a well-seasoned cast iron skillet will provide the dish with a nice even heat distribution and thus allow them to mingle in a beautiful way and develop their flavor. Cooking to eating is a very satisfying process for a meal.
This Black-Eyed Pea Skillet adds a great nutritional kick to a meal besides being delicious and easy. A powerhouse source of plant protein and dietary fiber, black-eyed peas help you stay full and satisfied long after eating. They’re also rich in vital nutrients, such as folate, iron and potassium, which are important for a healthy diet. You won’t find many that are as comforting and as nutritious as this one is. Oh, and with homemade you have time to control the ingredients, so no unwanted additives or too much salt is added to your meal.
Half the fun is serving this skillet! I love to place some garnishes ahead of time, so that everyone can add their own. Just a little fresh, bright parsley makes this pop and a splash of whatever hot sauce you prefer is a great zing to those who enjoy a bit of heat. Do not discount the utility of a side of crusty bread or a warm cornbread on which to dip all of that delicious liquid! It really is a meal that encourages sharing, and enjoying, no matter how you use it!
Some Valuable Tips To Remember
Let’s chat about a few tricks I’ve picked up to make your Black-Eyed Pea Skillet absolutely perfect, every single time. These little insights can make a big difference in your cooking, turning a good dish into a truly memorable one.
Customizing Your Skillet
This recipe is incredibly flexible! Don’t be afraid to make it your own. Here are some ideas:
- Add some greens: Stir in a handful of fresh collard greens, spinach, or kale during the last 5-10 minutes of simmering. They’ll wilt down beautifully and add extra nutrients and a lovely earthy flavor.
- Spice it up: For a little heat, add a pinch of cayenne pepper with your salt and pepper, or a dash of your favorite hot sauce at the end. Diced jalapeño cooked with the onion and bell pepper also works wonders.
- Meat variations: If bacon isn’t your thing, or you’re out, try diced smoked ham, ground sausage, or even shredded chicken. For a vegetarian option, simply omit the meat and add a smoky flavor with a teaspoon of smoked paprika.
- Herb power: Fresh thyme, oregano, or a bay leaf added during the simmer can deepen the aromatic profile. Just remember to remove the bay leaf before serving!
Troubleshooting Common Issues
- Skillet too dry? If your black-eyed peas absorb all the liquid too quickly and the skillet seems dry, simply add another 1/4 to 1/2 cup of broth or water until it reaches your desired consistency. Different brands of peas or broth can vary.
- Flavor falling flat? Sometimes a dish just needs a little something extra. A squeeze of fresh lemon juice at the end can brighten all the flavors. A tiny splash of apple cider vinegar also works wonders, adding a subtle tang that really makes the other flavors pop.
Pro Tip: For an even richer, deeper flavor, don’t be shy about letting your onions and bell peppers truly soften and even slightly caramelize. This low and slow sauté creates a sweet, savory foundation that elevates the entire dish.
Storing Leftovers
If you are lucky enough to have leftovers (which is rare in my house!), this skillet of food stores well. Make sure to let it cool completely, and then store it in an airtight container for up to 3-4 days in the refrigerator. It’s one of those dishes that is actually better the next day, as the flavors have had more time to meld together.
Alternatively, you can also divide the leftovers into individual portions, and store them in the freezer for up to 2-3 months. Let the portions thaw overnight in the refrigerator, and then reheat on the stove or in the microwave. You might want to add a splash of broth if it looks a bit dry.
So there you have it, a Black-Eyed Pea Skillet that is sure to become a staple in your home. Whether you’re looking to make a hearty weeknight meal, or just enjoy some southern comfort food, this skillet is a must-try. What’s your favorite way to enjoy black-eyed peas?
Frequently Asked Questions
Can I use dried black-eyed peas instead of canned?
Absolutely! If you’re using dried black-eyed peas, you’ll need to prepare them beforehand. Rinse about 1 cup of dried peas, then either soak them overnight or use a quick-soak method (boil for 5 minutes, then let stand for an hour). After soaking, drain and rinse, then cook them in fresh water or broth until tender, usually 45-60 minutes, before adding them to the skillet as directed in step 3. Just be sure they’re fully cooked but not mushy before adding them to the skillet. Using dried peas definitely adds another layer of homemade goodness, though it requires more planning.
What can I serve with Black-Eyed Pea Skillet?
This skillet is incredibly versatile and pairs well with many sides. My personal favorite is a slice of warm, buttery cornbread – perfect for soaking up all those delicious juices! It’s also fantastic served over a bed of fluffy white rice, brown rice, or even quinoa for an added protein boost. A simple side salad with a light vinaigrette makes for a complete and balanced meal. For a true Southern experience, serve it alongside some collard greens or mustard greens, if you haven’t already incorporated them into the skillet itself.
Is this recipe naturally gluten-free?
Yes, this Black-Eyed Pea Skillet recipe is naturally gluten-free as written! All the main ingredients – black-eyed peas, bacon, onion, bell pepper, and broth – are typically gluten-free. Just be sure to double-check the labels on your broth and bacon, as some brands might contain hidden gluten-containing ingredients, though it’s uncommon. It’s a wonderful option for those with gluten sensitivities or anyone looking for a wholesome, naturally GF meal.
Can I make this skillet vegetarian or vegan?
Making this skillet vegetarian or vegan is super easy. Simply omit the bacon entirely. To still get a smoky depth of flavor, I recommend adding 1-2 teaspoons of smoked paprika and a pinch of liquid smoke (if you have it) when you’re sautéing the vegetables. Make sure to use vegetable broth instead of chicken broth. You might also want to add a tablespoon of olive oil or another plant-based oil to the skillet to replace the bacon fat for sautéing the vegetables. The rest of the steps remain the same, giving you a delicious plant-based meal!
How can I make the Black-Eyed Pea Skillet thicker?
If you find your skillet is a bit too soupy for your preference, you have a few options to thicken it up. First, you can simply remove the lid during the last 10 minutes of cooking and let it simmer uncovered; this will allow some of the liquid to evaporate. Alternatively, you can mash about 1/4 cup of the black-eyed peas against the side of the skillet with your spoon – their starchiness will help thicken the broth. Another trick is to make a cornstarch slurry: mix 1 tablespoon of cornstarch with 2 tablespoons of cold water, then stir it into the simmering skillet and cook for another minute or two until it thickens. Just don’t overdo it!