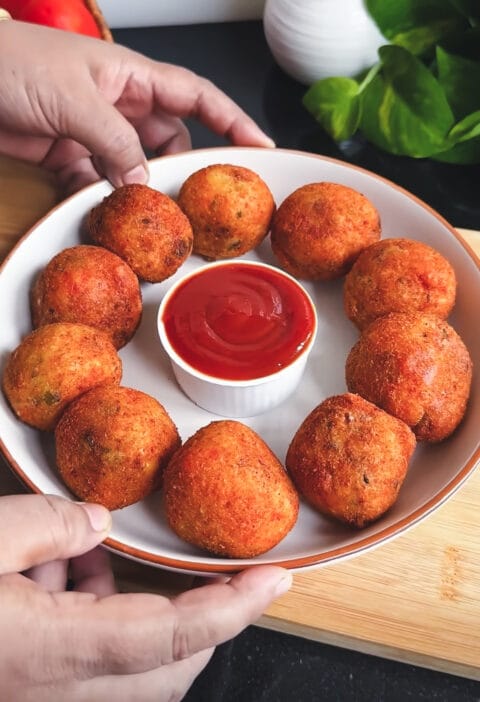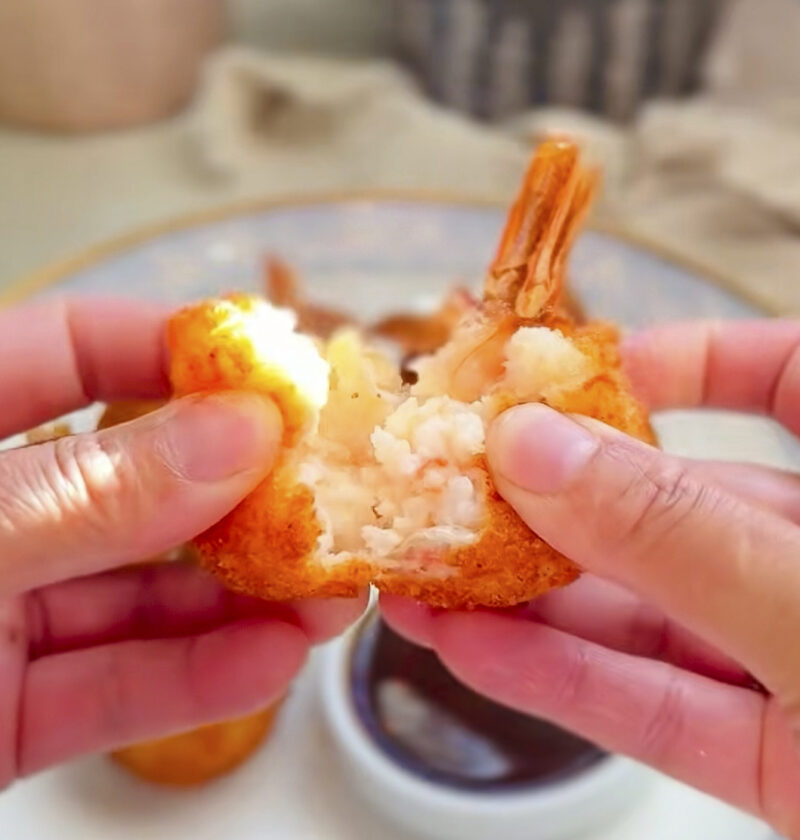
It’s a sunny summer afternoon, the temperatures are warm and light, and the air smells like something delicious is cooking. This is the sense I have each time I make these shrimp balls. Very fresh, super flavorful and the great bouncy feel you get in a fancy Asian restaurant. I know the kind of which I speak – well seasoned, juicy and very satisfying.
You’d think that getting that restaurant quality texture would be a complicated process, but I assure you, it’s not! All it takes is a few easy tricks that chefs employ to guarantee tender, springy, sweet shrimp taste in every bite. I’m going to guide you through the process of how to make them, so you can make a little magic right in your own kitchen. These are not only appetizers but a morsel of joy too.
Shrimp balls
These crispy-skinned, tender-centered shrimp balls capture the fresh sweetness of the sea in every perfectly formed bite.
Ingredients
-
-
- 1 lb raw shrimp, peeled, deveined, and tails removed
-
- 1 large egg white
-
- 2 tablespoons cornstarch
-
- 1 tablespoon finely grated fresh ginger
-
- 2 cloves garlic, minced
-
- 2 green onions, thinly sliced, plus more for garnish
-
- 1 tablespoon soy sauce (low sodium)
-
- 1 teaspoon sesame oil
-
- ½ teaspoon white pepper
-
- ½ cup panko breadcrumbs
-
- 2-3 tablespoons vegetable oil, for pan-frying
-
- Sweet chili sauce or your favorite dipping sauce, for serving
-
Necessary Utensils & Equipment
-
-
-
- Food processor
-
- Measuring spoons and cups
-
- Sharp knife
-
- Large non-stick skillet or cast iron pan
-
- Wire rack (for draining)
-
-
Instructions
-
-
-
- Prepare the Shrimp: Pat the peeled and deveined shrimp very dry with paper towels. This is a crucial step for texture!
-
- Process Half the Shrimp: Place half of the dried shrimp into a food processor. Pulse a few times until a coarse paste forms. Be careful not to overprocess; you want some texture here. Transfer this paste to a large mixing bowl.
-
- Chop Remaining Shrimp: Finely chop the remaining half of the shrimp by hand. This gives your shrimp balls a lovely textural contrast, ensuring some chunks remain. Add the chopped shrimp to the bowl with the shrimp paste.
-
- Combine Ingredients: Add the egg white, cornstarch, grated ginger, minced garlic, sliced green onions, soy sauce, sesame oil, and white pepper to the bowl with the shrimp. Mix everything really well with your hands until it’s fully combined and feels a bit sticky.
-
- Chill the Mixture: Cover the bowl with plastic wrap and refrigerate the shrimp mixture for at least 30 minutes. This helps the flavors meld and the mixture firm up, making it easier to form the balls.
-
- Form the Shrimp Balls: Take the chilled mixture and form it into small, uniform balls, about 1-1.5 inches in diameter. You should get about 16-20 balls. Roll each ball gently in the panko breadcrumbs, pressing lightly to coat.
-
- Pan-Fry the Shrimp Balls: Heat the vegetable oil in a large non-stick skillet over medium heat. Once hot, carefully place the shrimp balls into the skillet, making sure not to overcrowd the pan. You might need to cook them in batches.
-
- Cook Until Golden: Cook for about 3-4 minutes per side, turning occasionally, until they are golden brown and cooked through. The internal temperature should reach 165°F (74°C).
-
- Drain and Serve: Transfer the cooked shrimp balls to a wire rack lined with paper towels to drain any excess oil. Serve immediately with your favorite dipping sauce.
-
-
Tips For Truly Mastering The Recipe
You’ve got the basic steps down, but if you want to truly master these shrimp balls, there are a few extra pointers I’ve picked up over the years. These little tricks can make all the difference between good and absolutely incredible.
“The secret to really bouncy, flavorful shrimp balls is twofold: thoroughly drying your shrimp and not over-processing it. A mix of pulsed and hand-chopped shrimp creates the best texture.”
Getting the Perfect Texture
I tried this recipe the first time and had the error of putting all of the shrimp in the food processor and turning it into a paste. The balls that were produced were good, but the chew was not the same as with a few larger pieces, nor did they possess that wonderful shrimp taste. This is why it is crucial to chop half of the shrimp by hand; it helps to make it dynamic and interesting. Additionally, the mixture cools down and the proteins relax and firm up, thus reducing the risk of falling apart during cooking.
Variations and Dipping Sauces
These shrimp balls are a fantastic canvas for other flavors! Here are a few ways you can switch them up:
- Spice it up: Add a pinch of red pepper flakes or a teaspoon of sriracha to the shrimp mixture.
- Add herbs: Fresh cilantro or basil, finely chopped, would be a wonderful addition.
- For an extra crunch: Mix a tablespoon of finely chopped water chestnuts into the shrimp mixture before forming the balls.
- Dipping Sauces: While sweet chili sauce is classic, try a spicy mayo, a soy-ginger vinaigrette, or even a creamy lime aioli. A simple squeeze of fresh lime juice can brighten everything up beautifully.
Storage and Reheating
Leftover shrimp balls? Lucky you! They store quite well.
- Refrigeration: Store cooked shrimp balls in an airtight container in the refrigerator for up to 3 days.
- Freezing: You can freeze cooked or uncooked shrimp balls. For uncooked, freeze them on a baking sheet until solid, then transfer to a freezer-safe bag for up to 2 months. Cook from frozen, adding a few extra minutes to the cooking time. For cooked, cool completely before freezing in an airtight container.
- Reheating: To reheat, an air fryer works wonders for restoring crispiness. Pop them in at 350°F (175°C) for 5-7 minutes, or until heated through. You can also bake them in a conventional oven or pan-fry them again until warm.
What’s your favorite way to enjoy shrimp balls – as an appetizer, or do you pair them with something else?
Frequently Asked Questions
Can I bake these shrimp balls instead of pan-frying?
Yes, you certainly can! To bake them, preheat your oven to 400°F (200°C). Place the formed and breaded shrimp balls on a lightly oiled baking sheet and bake for 15-20 minutes, flipping halfway through, until golden brown and cooked through. They might not be as crispy as pan-fried, but they’re still delicious!
What kind of shrimp should I use for shrimp balls?
I always recommend using fresh or frozen raw shrimp that’s already peeled and deveined for convenience. Medium to large shrimp (around 21/25 count per pound) work best. If using frozen, make sure to thaw it completely and pat it very dry before proceeding with the recipe.
Is cornstarch essential, or can I use another binder?
Cornstarch plays a crucial role in giving these shrimp balls their signature bouncy texture and helping them hold their shape. While you could experiment with a small amount of all-purpose flour or tapioca starch, cornstarch typically yields the best results for this specific texture.
Can I make the shrimp ball mixture ahead of time?
Absolutely! You can prepare the shrimp mixture, form the balls, and even roll them in panko breadcrumbs a few hours in advance. Just cover them tightly and refrigerate until you’re ready to cook. This is a fantastic way to break up your prep work for entertaining.
How do I know if my shrimp balls are cooked through?
Cooked shrimp balls will be opaque throughout and firm to the touch. If you have a meat thermometer, the internal temperature should reach 165°F (74°C). The outside should be beautifully golden brown and crispy from the pan-frying.