
I get it. Floating shelves look sleek, clean, and totally effortless in those magazine spreads. But if you’ve ever tried to install them yourself, you know “effortless” is maybe the wrong word. You bought the expensive kit, found the wall, started drilling, and suddenly you had more holes than shelf space, and the whole thing was wobbly.
I’m here to tell you two things: First, you are not alone. Second, installing floating shelves isn’t actually hard—you just need the right approach, especially when dealing with hidden brackets and the mystery of drywall versus wood studs.
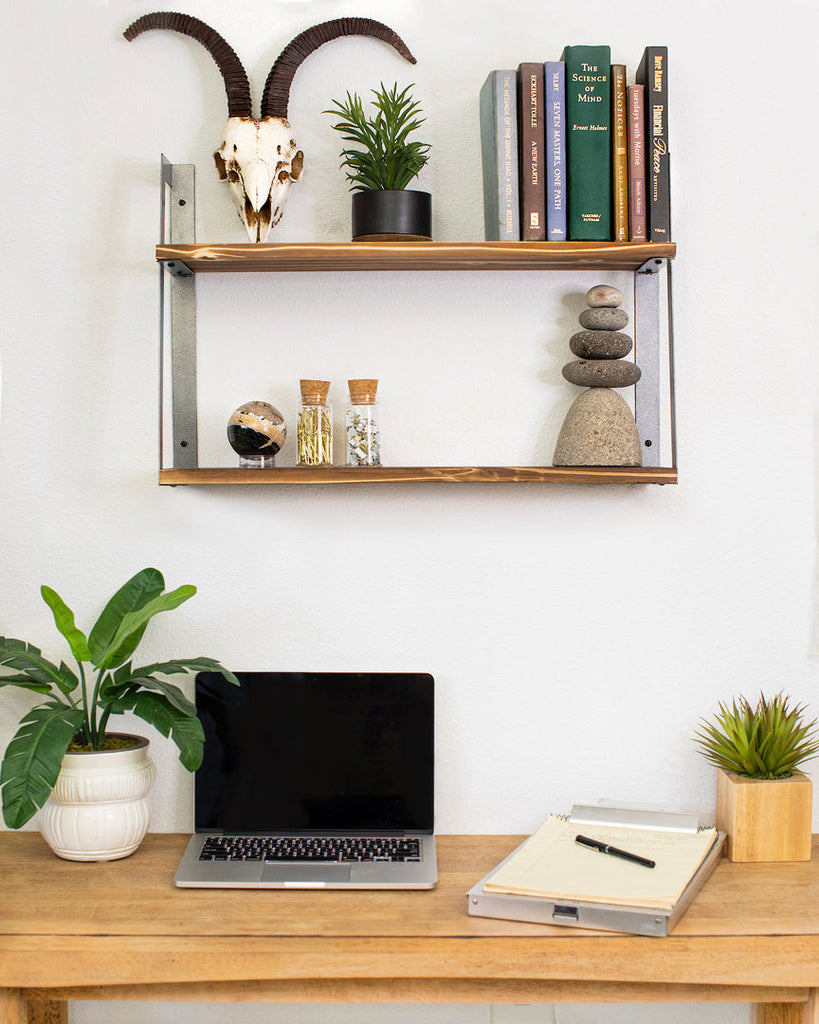
Honestly, the main thing I liked about getting this process right is the extremely strong final result. I used to think I couldn’t put anything heavy on these things, but oh man o man! Once I figured out the secret to those blind shelf supports, it completely changed how I decorate. You can assure yourself that this guide will be an eye opener.
Key Takeaways
- Learn the only reliable way to find studs and map out your perfect shelf placement.
- Discover the secret to making your shelf perfectly flush with the wall (it involves recessing the brackets).
- Know exactly which heavy duty anchors to use when mounting floating shelves on drywall without studs.
- Understand the physics of weight and placement to maximize your shelf’s holding capability.
The Only Tools You’ll Actually Need (Stop Overbuying!)

Look, the hardware store is designed to make you buy things you don’t need. When we’re talking about how to install floating shelves, the necessary tool kit is pretty basic. You don’t need the fanciest impact driver on the market, but you definitely need reliable leveling equipment.
Before you even open the box, check that you have these essentials ready. Having them lined up will cut your installation time in half:
- Stud Finder: Spend twenty bucks on a decent digital one. The cheap magnetic ones are cute, but you need certainty.
- Leveling Tool: A long bubble level (at least two feet) is better than a tiny one, especially for wider shelves.
- Drill/Impact Driver: You’ll need plenty of juice to drill pilot holes and drive those long lag screws into wood studs.
- Drill Bit Set: You’ll need masonry bits for brick walls and standard wood/drywall bits for everything else. Make sure you match the drill bit size to your chosen fastener diameter!
- Painter’s Tape and Pencil: For mapping out the floating shelf template and marking your pilot hole spots clearly.
- Screwdriver/Socket Wrench: Depending on the type of mounting bracket, you might need a socket to tighten things down fully.
The funny thing is, the sound of a truly solid stud finder locking onto the center of a piece of wood is so satisfying. It’s that nice, confident “BEEP” that tells you this shelf is going to hold, and you won’t hear that dreaded crunch of drywall giving way.
Finding the Sweet Spot: Studs, Drywall, and Anchors That Work

This is where most people get tripped up. Do I need to hit a stud? How many studs do I need? The answer depends entirely on the weight capacity you require. If you’re just displaying a few tiny photos, drywall anchors might be fine. But if you’re loading it up with books or heavy kitchen ceramics, you have to find those wood studs.
The first time I tried this, I made the mistake of assuming the previous owner had put the studs exactly 16 inches apart and trusted a cheap battery-powered stud finder. I drilled eight pilot holes for one bracket, looking for wood, and got nothing but chalky, disappointing drywall dust.
What fixed it for me? Patience and mapping. You need to map out the entire run of your shelf hardware before drilling anything permanent. Use your level and painter’s tape to draw a line where the top of your bracket will sit.
Mapping Your Bracket Placement
Most structural experts agree that if your shelf spans 32 inches or more, you should try to hit at least two separate studs. If your shelf is short (say, 16 inches), you can often get away with one central stud and then heavy-duty drywall anchors on the edges for anti-rotation stability. This is a very strategic approach to placement.
If you absolutely cannot hit a stud, or if your ideal location falls right in between, you must upgrade your anchors. You need specialized anchors designed to spread the weight over a large area behind the drywall, like good toggle bolts or snap toggles. Don’t use those little plastic anchors that come with the cheap shelf kit; they’re essentially worthless for anything heavier than a feather. We’ll get into the best anchors in a minute.
The Bracket Mounting Secrets: Why Your Shelf Isn’t Flush with the Wall

This is the biggest aesthetic problem with floating shelves. You get the mounting bracket perfectly level, you slide the shelf body on, and suddenly there’s a noticeable gap between the back of the shelf and the wall. It looks amateur, and it lets dust settle right in the crack.
The secret is understanding the hardware itself. Floating shelves with hidden brackets use blind shelf supports. These supports slide into pre-drilled holes in the shelf body. When you tighten the bolts that hold the support bars, they sometimes push the bracket mechanism slightly forward, creating that gap.
To fix this, you need to slightly recess the mounting plate into the drywall or wood stud. This sounds complicated, but trust me, it’s quick.
After you’ve marked your pilot holes and determined where the bracket will sit, take a pencil and trace the outline of the bracket plate onto the wall. Now, grab a utility knife or an oscillating tool and score the drywall about an eighth of an inch deep, just within that traced line. You’re creating a shallow pocket for the plate to sink into.
Pro Tip: For a truly flush fit, recess the wall plate about 1/8 inch deep into the drywall using a utility knife before screwing it in. This lets the hardware sit slightly behind the plane of the wall, ensuring the shelf wood meets the wall snugly, eliminating those annoying gaps.
Once you screw the bracket into this small depression, the metal plate is effectively hidden, and when you slide the shelf onto the supports, the back edge will feel tight and solid against the wall surface. It makes all the difference in the final look.
Drywall vs. Masonry: Picking the Right Fastener Approach

Since we’re dealing with the reality of installation, we have to talk about what’s actually behind the paint. Installing floating shelves on drywall without studs requires entirely different hardware than installing on a masonry wall (like brick or concrete) or directly into wood framing. You must choose wisely, or your shelf will fail.
If you’re attempting to mount floating shelves over a tile backsplash, which is common in kitchens, you essentially treat the tile and the substrate behind it (usually cement board or drywall) as one unit, using the specific drill bit for the surface (a diamond or carbide-tipped bit for tile) but driving the structural fastener into the solid material behind it.
Let’s check out the essential hardware types you need to know about, depending on your wall material:
| Wall Type | Recommended Fastener/Anchor | Max Weight (Per Anchor, Est.) | Key Installation Tip |
|---|---|---|---|
| Wood Studs (Best Case) | Lag Screws (Min. 3 inches long) | 50–100 lbs | Always drill a pilot hole first to avoid splitting the wood stud. |
| Drywall (No Studs) | Toggle Bolts or Snap Toggles | 30–50 lbs | Ensure the anchor fully expands/opens up behind the drywall sheet. |
| Standard Drywall Anchors (Light Duty) | Self-drilling/Plastic expanding anchors | 10–15 lbs | Only use for display items; avoid stacking books. |
| Masonry Wall (Brick/Concrete) | Masonry Screws (e.g., Tapcons) or Shield Anchors | 75–150 lbs | Use a hammer drill and carbide-tipped masonry drill bit. |
A reputable source like This Old House offers great visual guides on how to properly seat different types of wall anchors, reinforcing the fact that installation quality depends on the quality of the connection to the wall’s structure. It’s worth looking into specialized hardware documentation if you are dealing with particularly old or fragile walls.
If you have older plaster and lath walls, that’s a whole new headache, but typically, you want to drill past the plaster and try to connect directly into the lath strip or stud, using longer screws and washers if necessary. The goal is always to bypass the superficial wall material and grab onto the structural foundation.
Final Installation and Leveling: Say Goodbye to the Dreaded Wobble

You’ve secured the bracket, recessed the plate, and everything feels solid. Now for the moment of truth: sliding the shelf body onto the blind shelf supports and fixing a wobbly floating shelf.
If you purchased a high-quality kit, the shelf body will slide easily onto the support arms. But because manufacturing tolerances vary, you might notice that the shelf seems perfectly level when it’s empty, but when you put a book on one end, it starts to sag or tilt.
This is usually due to one of two things: either the support arms aren’t perfectly aligned, or the retention screws (often small grub screws underneath the shelf) aren’t tight enough.
Here is the final process to ensure that shelf stays exactly where you put it:
- Initial Slide: Gently slide the shelf onto the bracket arms. Don’t force it, but ensure the back edge is flush with the wall.
- Check Leveling: Place your long level on the shelf. If it’s slightly off, some brackets allow for minor vertical adjustments using internal mechanisms. If yours doesn’t, you might need to slightly loosen the wall screws, adjust the bracket until it’s perfect, and re-tighten.
- Tighten Retention Screws: Use the small hex key or screwdriver provided to tighten the tiny set screws on the underside of the shelf. These screws bite into the bottom of the metal support arms, locking the shelf onto the bracket.
- Test Loading: Place about half the shelf’s intended weight on the shelf, focusing on the ends. If you hear any creaking or see any visible tilting, immediately unload the shelf. You need stronger anchors or better stud contact.
When you install L shaped floating shelves, the leveling must be checked along both axes (the short side and the long side). Any slight error in the corner bracket will get dramatically amplified as the shelf extends away from the wall.
Weight Capacity Guide: How Much Stuff Can My Shelf Hold?

Let’s be real, the advertised maximum weight capacity for floating shelves is often theoretical. That number usually assumes you hit two perfect wood studs, use high-grade lag screws, and distribute the weight evenly. When you start throwing in drywall anchors, that number plummets.
Two primary factors dictate the real-world weight capacity for floating shelves installation:
- The Wall Connection: As detailed above, wood studs are King. Drywall anchors are acceptable for light loads only.
- The Length of the Shelf and Bracket Spacing: The longer the shelf, the greater the leverage (and strain) placed on the anchoring points.
When considering how far apart should floating shelf brackets be placed, remember that the shelf material itself matters. If you have a solid wood shelf that is 60 inches long, placing the brackets only 16 inches apart (hitting one stud) will leave 22 inches of unsupported wood dangling on either side. That wood will eventually start to bow or tip.
For shelves over four feet long, you really should aim for three brackets—even if only the two outer ones hit studs, the central bracket provides crucial stability and helps prevent the shelf material from sagging over time. This reduces the sheer force acting on your wall anchors.
If you’re planning on storing something truly heavy, like a collection of vinyl records or a stack of hardcover textbooks, you should assume the safe, usable weight limit is about 50% of the manufacturer’s stated maximum—unless you’ve secured every single bracket point directly into solid wood framing. It’s better to underload than wake up to a crash.
If you really want to dive into the engineering specifics of how load bearing works on different types of walls, you can check out structural engineering references. For example, understanding how shear stress is calculated for fasteners provides a deeper perspective on safe loading limits. It’s pretty fascinating stuff if you enjoy building things.
Frequently Asked Questions
Can I install floating shelves over a tile backsplash?
Absolutely, but it requires the right hardware. You’ll need a tile-specific drill bit (diamond or carbide-tipped) to get through the ceramic or porcelain without cracking it. Once you’re through the tile, you install your fastener (lag screw for studs, toggle bolt for cement board/drywall) into the substrate just as you would on a standard wall. Always start slow and use a small pilot hole to prevent chipping the tile surface.
What are the best anchors for heavy duty floating shelves if I can’t find a stud?
The consensus winner is the toggle bolt, specifically the modern metal snap toggle variety. These anchors open up behind the drywall to create a very large, stable base plate, distributing the load over a wider area. They provide significantly better pull-out strength than traditional plastic drywall anchors and are highly recommended for supporting books or dishes.
How do I ensure a floating shelf is perfectly level?
Always use a level that is longer than the shelf itself, if possible. Once you mark your first pilot hole using the floating shelf template, use the level to draw a crisp, horizontal line across the wall where the bottom of the bracket will sit. Drill all subsequent holes along that line. When you put the shelf on, use small shims (if needed) between the bracket and the wall before final tightening, but ideally, the initial line should prevent any major errors.
Is using an impact driver necessary for floating shelf installation?
While not strictly mandatory, I strongly recommend it when driving long lag screws into wood studs. A standard drill often lacks the rotational force (torque) to drive a thick, long screw fully flush, especially if you are tired. An impact driver makes that job incredibly quick and easy, ensuring your connection to the wood stud is as tight as possible.
You’ve got the knowledge now. You know how to find the studs, what anchors to use, and the little trick for that flush finish. It’s time to stop looking at those bare walls and get drilling! What’s the first thing you’re going to put on your new, solid shelf?


Leave a Reply